Google lets you take everything with you. The catch is that Takeout stores each photo’s date, location and description in a separate JSON file. Copy only the photos to a new service and your 2018 holiday can land in the year you exported it, with no map pin.
This guide picks a route that keeps those details, then has you check the result before anything is deleted.
The Plan at a Glance
| Stage | Hands-on time | Waiting time |
|---|---|---|
| Choose a destination | 10–20 minutes | None |
| Start the export or transfer | About 5 minutes | Minutes to a few days while Google builds it |
| Download and unzip (Takeout route) | 15 minutes | Several hours for 50 GB or more |
| Import into the new service | 15–30 minutes | Hours to days for a large library |
| Check the result | 30–60 minutes | None |
| Switch phone backup, then delete or keep | 10 minutes | None |
You can pause at any point without losing anything, because nothing is deleted from Google Photos until the very last step.
Before You Start
- Check how much you store at photos.google.com/storage.
- Free up disk space of about twice your library size, for the zip files plus the unzipped copy. You don’t need this for the iCloud transfer.
- Use a computer with a steady connection. Google recommends downloading Takeout on a desktop, not a phone.
- Know your quality setting. If you backed up in Storage saver, Google only kept compressed copies. That’s what you’ll get back. Look for the originals on old phones or computers if they matter.
- Know what stays behind. Shared albums that other people own and Google’s face groups don’t come with you.
- Don’t delete anything yet. Deletion is the last step, after you’ve checked counts.
Choose Where Your Photos Go
| Destination | Best for | Price (Oct 2026) | Can the provider see your photos? | How dates come across |
|---|---|---|---|---|
| Ente Photos | Most people | 10 GB free. 50 GB about $2.49/month, 1 TB about $9.99/month | No, end-to-end encrypted | Desktop app reads the Takeout files |
| Immich | People with a home server | Free, open source. You pay for the hardware | It’s your server | immich-go reads the Takeout zips |
| iCloud Photos | iPhone and Mac households | Check Apple’s current iCloud+ prices | Yes, unless Advanced Data Protection is on | Direct transfer from Google |
| Proton Drive | People already paying for Proton | 5 GB free. 200 GB about $4.99/month | No, end-to-end encrypted | Fix the files first, then upload |
| Plain folders | An archive on a disk or any cloud | The cost of the drive | Depends where you keep them | Fix the files first |
Our default is Ente Photos. It’s open source, end-to-end encrypted, has apps for iPhone, Android, the web and every desktop system, and has been through independent security audits. It has shared albums and family plans, and it imports Takeout exports. Its search is weaker than Google’s.
Another destination may suit you better.
- Immich suits you if you run a home server (a NAS or a mini-PC) and are ready to handle updates and a separate backup. Its interface feels a lot like Google Photos, with face recognition, maps and memories. Opening it up to the internet takes care.
- iCloud Photos makes sense if your household is on iPhone and Mac. Google offers a direct transfer to it, so there’s nothing to download.
- Proton Drive fits if you already pay for Proton Unlimited (500 GB) and want one fewer service. It has fewer photo features, with no face search.
- Plain folders work if you want an archive you control, and you’ll browse it with any photo app.
Full comparisons are on our Google Photos alternatives page.
Option A Transfers Straight to iCloud Photos
If you’re moving to iCloud anyway, this is the easiest route. Google copies your library directly into iCloud, and the file name, description, file type and location come across, so the JSON problem never comes up.
You need all of the following.
- iCloud Photos and iCloud Drive turned on.
- Enough iCloud storage for the whole library.
- Advanced Data Protection turned off during the transfer.
- An eligible account. The option isn’t offered for child accounts or Managed Apple Accounts, and it only appears in Takeout if your account qualifies.
- On a computer, go to takeout.google.com/takeout/transfer/custom/photos and follow the prompts to start the export.
- Choose Apple - iCloud Photos as the destination and sign in to your Apple Account.
- Click Allow to let Google add photos and videos to iCloud.
- Check progress, or cancel, at privacy.apple.com. Apple emails you when the transfer starts and when it finishes.
Here’s what to expect.
- The transfer takes several hours to a few days.
- It lands in an album named Import from Google. RAW and other unsupported files go to an iCloud Drive folder with the same name.
- Motion Photos and Memories are left out. If those matter, also make a Takeout (Option B) and keep the archive.
- Re-running the transfer doesn’t create duplicates.
- Nothing is deleted from Google Photos.
When it’s done, turn Advanced Data Protection back on. Apple doesn’t offer it to new users in the UK.
Option B Exports With Google Takeout
Use this for Ente, Immich, Proton Drive or plain folders.
- Go to takeout.google.com on a computer and sign in.
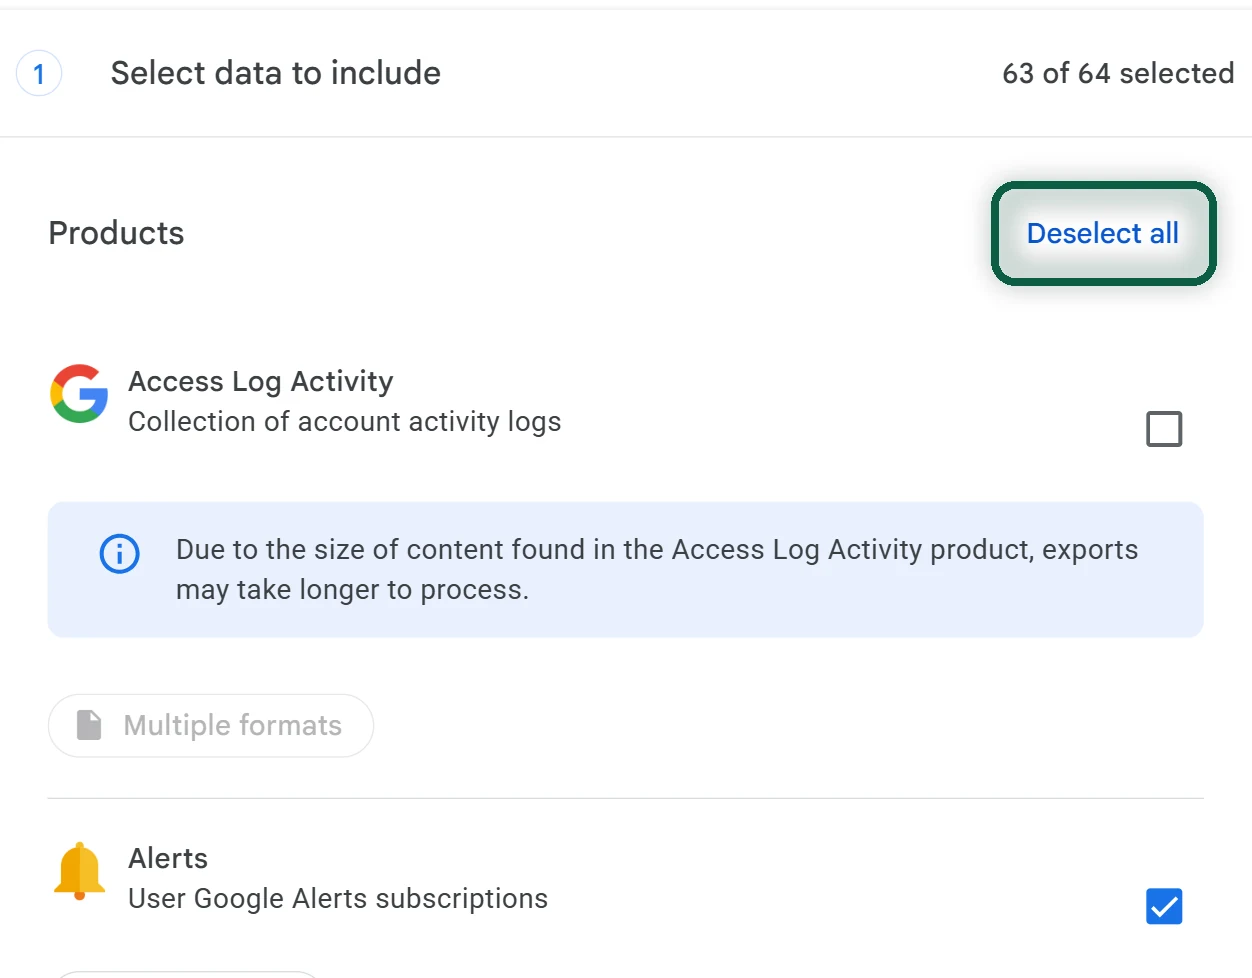
- Click Deselect all, then tick Google Photos. Leave All photo albums included as it is, or click it to pick specific albums.
- Click Next step.
- Choose Send download link via email and a one-time export. Your account may label it Export once or One-time archive.
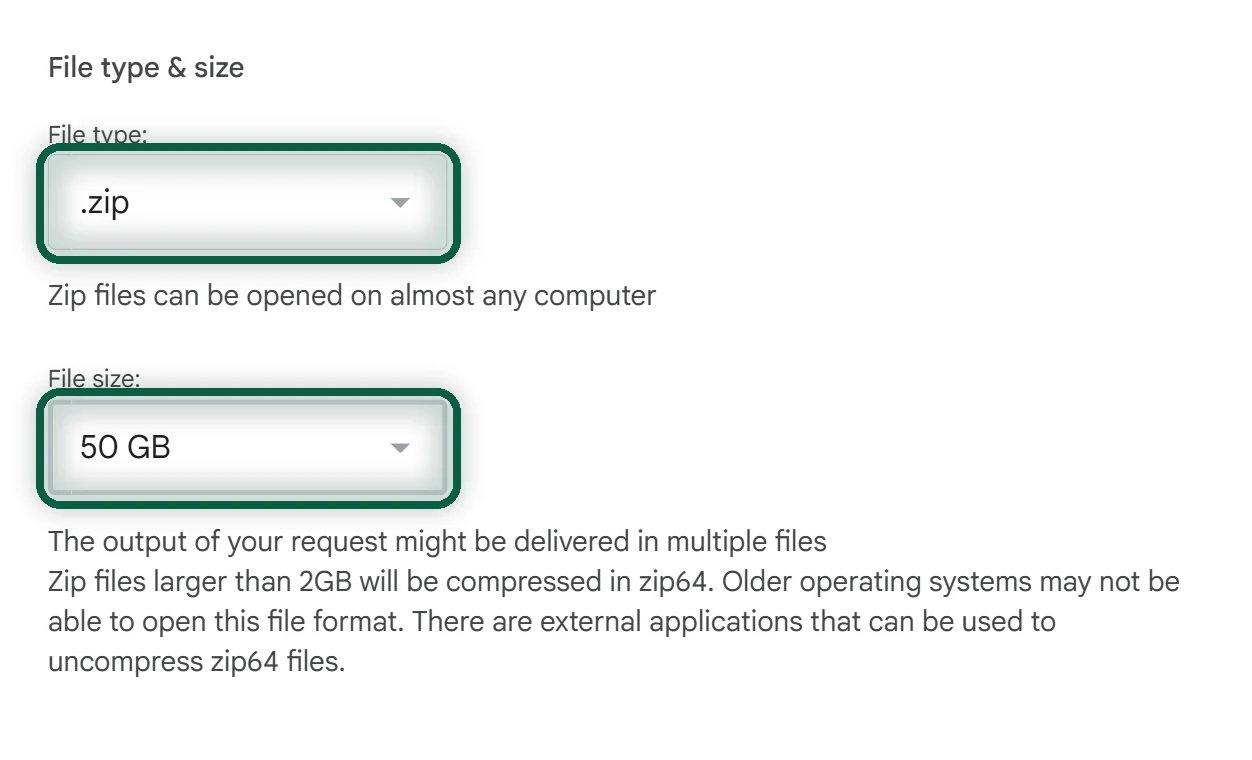
- Choose .zip and 50GB, then click Create export.
- When Google’s email arrives, click Download archive and download every part.
- Unzip every part into the same parent folder, keeping the subfolders as they are.
Archive Size and File Type
50GB means fewer parts, and Google says it reduces the chance of splitting. If your connection drops often, pick a smaller size such as 2 or 4 GB so a failed part is quicker to retry. Stick with .zip. Google warns that .tgz files need extra software on Windows and can’t have Unicode characters in file names.
Several Archives
A big library is split into several numbered parts. Each part can be downloaded 5 times, and the links expire after about 7 days, so download them all promptly. A photo and its JSON file can end up in different parts, which is why step 7 puts everything in one folder.
Google says an export takes anywhere from a few minutes to a few days, and most people get it the same day. Photos you take after the export aren’t in it, so switch your phone’s backup to the new service soon after (see the last section).
Get the Dates and Places Back
Why Dates Go Missing
Next to each photo, Takeout writes a JSON file with Google’s record of when it was taken (photoTakenTime), where (geoData) and your description. If you upload only the images, anything missing from the photo itself is lost. Pictures received through chat apps and photos edited in Google Photos are the usual victims.
Matching each photo to its JSON file is harder than it sounds, for a few reasons.
- Sidecars are now often named like
IMG_1234.jpg.supplemental-metadata.json, while older exports usedIMG_1234.jpg.json. - Long names get cut short, ending in something like
.supplemental-me.json. - Extensions and capitals can differ from the photo (
.jpeg.jsonfor a.jpg). - Some photos have no sidecar at all.
Also check your own export for doubles. The same photo can sit in a “Photos from 2019” folder and in an album folder, edited photos can appear as an extra -edited copy, and Motion Photos can split into a still and a short video. Takeout-aware importers handle some of this. Plain uploads don’t.
Import Into Ente With Its Google Takeout Upload
Labels can differ slightly between versions of Ente’s app.
- Install Ente’s desktop app and sign in.
- Click Upload, then Google takeout.
- Choose Unzipped folder (recommended) and select the parent folder from Option B, step 7.
- Choose Create albums, then Separate albums to recreate your album folders, or pick Import to existing album.
- Wait for Calculating Files to finish, review the summary, then click Start import.
Ente reads the JSON files before uploading and matches them to your photos. It can also take the zip files directly, but Ente warns that when Google splits a photo and its JSON across two zips, the details might not match. Use the unzipped folder, and leave the app running. Uploading a whole library from a phone is slow. Our Google Photos to Ente Photos walkthrough adds plan sizes, shared albums and the checks to run afterwards.
Import Into Immich With immich-go
- In Immich, open Account settings, then API Keys, and create a key.
- Install immich-go and run it against your Takeout zips with your server address and key, as in the command below.
immich-go upload from-google-photos --server=http://YOUR-IP:2283 --api-key=YOUR-KEY /path/to/takeout-*.zip
immich-go reads the zip files without unzipping them and matches photos with their JSON metadata, keeping albums, descriptions and locations. It works with Immich v2 and v3. Immich v3.0 (July 2026) had breaking changes, so read Immich’s “Migrating to v3” notes before upgrading an older server. If you’re setting up Immich for the first time, follow our Google Photos to Immich walkthrough, which starts with the server.
Fix the Files First for Proton Drive or Plain Folders
Proton Drive has no Takeout importer (you upload by hand), and plain folders have none either. Write the dates into the photos before you upload them. These are the tools people use for it.
- GooglePhotosTakeoutHelper (open source)
- google-photos-exif (open source, runs on Node)
- exiftool with a script, if you’re comfortable on the command line
- Metadatafixer (paid)
Work on a copy and keep the original zips untouched. If you script it with exiftool, beware that photoTakenTime is in UTC. Copying it over the photo’s own date can shift times by your time zone, so keep the camera’s date where it exists and fill only empty fields (exiftool’s -wm cg write mode does this).
Check Before You Delete Anything
- Compare totals. Count the photo and video files in your unzipped Takeout, ignoring the .json files, and compare with the item count in your new library. Expect small differences from removed duplicates and split Motion Photos.
- Scroll year by year. Each year should look about as full as it did in Google Photos. A big pile on the export date means the dates weren’t read.
- Spot-check 20 photos from different years for the right date and place.
- Open a few albums and play a few videos.
- Check the usual problem photos, which are pictures saved from chat apps and photos you edited in Google Photos.
If something is wrong, delete the bad upload and re-import from the single folder with a tool that reads the JSON files.
Last, look at the gap. Photos you took between the export and switching your phone’s backup aren’t in the Takeout. Once the new app’s phone backup has caught up (next sections), check that the last few weeks are there.
Keep a Second Copy
One cloud service is one copy. Keep the original Takeout zips on an external drive. They’re the closest thing to what Google held. If you self-host Immich, back up the server to another disk or cloud as well. Tools such as rclone and restic are popular for this.
Switch Phone Backup, Then Decide About Google Photos
- Install your new app on your phone, turn on its backup, and let it catch up.
- In the Google Photos app, open Settings, then Backup, and turn it off.
- Share your albums again from the new service, and tell anyone you shared a library or album with.
- When you’re sure, delete your photos from Google Photos and empty its Trash.
- If you paid for Google storage only for photos, cancel or downgrade it.
Keeping Google Photos is fine too. With backup off, nothing new goes to Google, and the old library can sit there as an extra copy. To close the whole account, see how to delete your Google account.
Troubleshooting
Photos show up on the export date. The importer didn’t find the JSON files. Unzip every part into one folder, delete the bad upload, and import again with Ente’s Google takeout option or immich-go.
Lots of duplicates. Album folders repeat photos from the year folders, and edited photos can come with an extra copy. Takeout-aware importers handle more of this than plain uploads.
Live or Motion Photos became two files. Expect a still and a short video. Keep both.
A Takeout download keeps failing. Pick a smaller archive size, or create a new export. Each part allows only 5 downloads.
The link expired. Create a new export. Links last about 7 days.
Some albums are missing. Albums that other people shared with you aren’t exported. Ask the owner to share them again from their new service, or save the photos you want to your own library before you export.
No iCloud option, or the transfer fails. The option only appears for eligible accounts, and child accounts and Managed Apple Accounts can’t use it. Check that Advanced Data Protection is off and that iCloud Photos and iCloud Drive are on.
Photos look softer than expected. They were probably backed up in Storage saver. Google doesn’t have the originals.
When your photos are settled, the scan tool shows which other Google services you still use, and what to move next.